
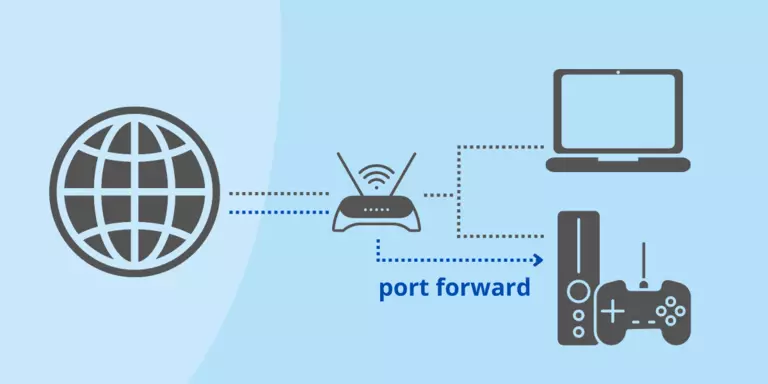
A port forward is a way of allowing specific traffic to enter your network through your router. It is useful in gaming, torrenting, security cameras, home automation, and many other applications. Any time that you want to connect to something inside your network from the internet, you need a port forward.
Many games and applications require a port forward to operate correctly. A port forward is a way of allowing specific traffic through your router. By default, routers allow traffic to leave your network without any problems. They also act as a firewall and prevent unwanted traffic from coming into your network from the internet. A port forward is a rule in your router that directs specific incoming traffic to a computer or device on your network.
What is a Port Forward?
Forwarding a port is a way to allow a connection from the internet, through your router, to a device on your network. You can think of forwarding a port as putting the device on the outside of your router. Your router blocks all incoming connection requests making it impossible for some services to work correctly. A port forward overcomes this limitation. In order to forward ports, you will need to know the ports that the application uses and the IP address of the device that you are forwarding ports to.
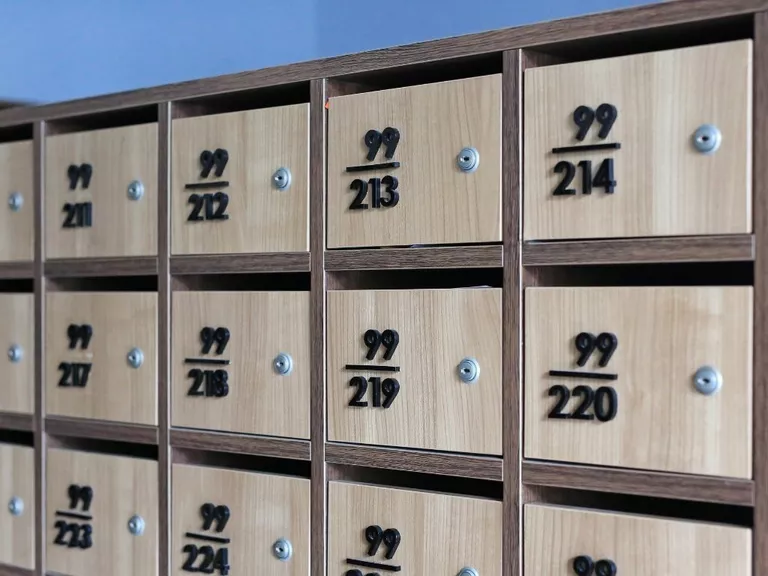
All network traffic has a port number attached to it. You can think of the port number like an inbox in an office. Once the network traffic gets to your computer or device, it is sent to the application that needs it. The port number of the traffic is what takes care of this last step.
For many things, the port number is an industry-standard. Common industry standard port numbers are 80 for web traffic and 443 for secure web traffic. In other cases, the port number is random per installation, which is the case with many torrent clients. In yet other cases, the port number is made up by the application vendor, which is common for independent games and smaller application developers.
Common Port Numbers
Here is a sample of some of the common, industry standard port numbers:
Application Ports Web servers 80 TCP & 443 TCP Cameras Frequently 8080 TCP Xbox Live 3074 TCP & UDP Plex Media Server 32400 TCP & UDP SSH 22 TCP OpenVPN 1194 TCP & UDP Remote Desktop (RDP) 3389 TCP & UDP
We have a List of All Known Ports that shows the ports that are used by specific games and applications.
Throughout this article, we refer to computers and devices. You can think of them as the same. For instance, there is no difference between forwarding a port to your Xbox and forwarding a port to your computer. The steps for testing if a port has been forwarded are different for computers and devices, but the process for setting up the port forward in your router is the same.
Why You Need a Port Forward
Some of the most common reasons to forward a port include:
- Multiplayer games that have a lobby, such as Call of Duty or Battlefield
- PC gaming including Steam, GOG Galaxy, and Epic
- Game networks such as PlayStation Network and Xbox Live
- Peer-to-peer sharing software, such as torrent or LimeWire
- Home automation such as Home Assistant, HomeKit, openHAB, and SmartThings
- Hosting a service from home, such as TeamSpeak, SQL, or a website
- Accessing security cameras from a remote location
- Sharing files with OwnCloud, SeaFile, or NextCloud
- Remotely accessing media using Plex, Emby or Jellyfin
- Relaying ham radio with EchoLink
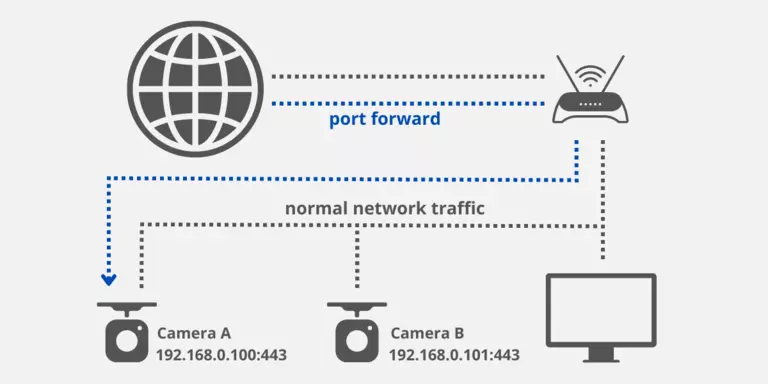
Anytime a connection to your network needs to be created from the outside, you need a port forward. Surfing the web does not require a port forward because your web browser contacts a web server and starts the communications. This connection originates on the inside of your network, and your router allows it without any additional configuration.
However, if you want to connect to your security cameras from outside your network, you need to forward a port. The reason for this is because a connection to your cameras must be created from outside your network. By default, routers do not allow any incoming connections. The same is true if you want to host a web server, a TeamSpeak server, or any other service inside your network.
Video games benefit from a port forward as well. Gaming services such as Xbox Live and PSN tend to prioritize consoles that have a port forwarded to them. When this happens, your console is the host in a multiplayer match. As the host console, you have a better experience because you will have the least amount of lag compared to everyone else in the game. In this case, a port forward can significantly increase your gaming experience.
Which Ports Do You Forward?
The vast majority of software has a predefined port that you need to forward. You can use our List of Ports to find which ports you need to forward for your application.
Ports are listed as either a list, a range, or a combination of both. A list of ports has commas separating the values, while a range has a hyphen. For instance, the following range:
TCP: 1000-1003
This port list can also be written as individual ports:
TCP: 1000, 1001, 1002, 1003
Some routers accept a mixed list that includes ranges, while others do not. There are even some poorly designed routers out there that will only take a single port at a time. If you have one of those, we suggest you upgrade.
NOTE: Network ports are listed as either TCP or UDP. Generally speaking, it's fine to open both. So if your router has an option of TCP, UDP, or BOTH, you can choose BOTH. While troubleshooting port forwards, it is best to open more ports than you think you need. Then, once your application is working, you can go back and pair it down to a shorter list of only the ports that are required.
Many torrent programs, on the other hand, choose a random port at application installation. This makes it so that each user has a different port to forward. If you are forwarding a port for one of those applications, you need to find the random port your application uses.
For instance, if you are forwarding a port for qBitTorrent, you will find the port to be forwarded by clicking on Tools, Options, and choosing the Connection tab. Your port is listed next to "Port used for incoming connections".
How To Set Up a Port Forward
Setting up a port forward involves a few detailed network terms. Be prepared to write down a few notes as you go through the process.
There are 4 major steps to setting up a port forward.
The major steps of port forwarding are:
- Assign a static IP address to your computer or device
- Log in to your router
- Forward ports to your computer or device and create a rule in your computer firewall (not necessary for devices like Xbox, PlayStation, or cameras)
- Test that your port is forwarded properly (not always possible with some devices)
We offer software to forward your ports for you. If you want to spend your time doing other things instead of figuring this out, check out our Network Utilities software.
Step 1: Assign a static IP address
Assigning an IP address to your device is an often overlooked step that can save you a lot of frustration in the long run. All devices on your network have an IP address assigned to them by your router from a pool of available IP addresses.
The first thing you need to know is that IP addresses can be either static or dynamic. Dynamic IP addresses are also referred to as DHCP addresses. The "D" means dynamic. Dynamic addresses can change, and that's a problem.
A port forward directs a port on your router to an IP address on your network. The destination of a port forward is the IP address on your network. If this IP address changes, then the port forward breaks. We see this happen all the time.
When your device or computer reboots, it asks your router for an IP address. A well-designed router hands the same IP address to your computer or device each time that device connects to your network or boots up. Unfortunately, most routers do not do this and hand out IP addresses at random from the pool each time a device asks for one. When this happens, it can potentially point a working port forward at the wrong device. An example is if your Xbox Live port forward is pointing at your computer, then it's completely useless.
For much more information about static IP addresses read our Static Vs. Dynamic IP Address guide.
To solve this problem, we need to assign a static IP address to each device on your network that will be the target of a forwarded port. There are 3 different ways we can do this:
- Manually using the command prompt and windows built-in network settings (hardest)
- Manually by using your router's DHCP reservation system (easier)
- Automatically with software (easiest)
Assign a Static IP Address By Hand
While this is a possible solution to the static IP address problem mentioned above, it has a few issues. The biggest problem with this solution is that without knowing your exact DHCP pool in your router, it's easy to create an IP address conflict accidentally. Another problem is that it can create a distributed management situation where you have to visit each device on your network to make changes.
It can be incredibly annoying if the device does not have an easy-to-use interface for changing settings. For instance, this is a poor choice for a WiFi printer, thermostat, or other WiFi-connected devices. It is a reasonable method for setting up a static IP address on a computer or gaming console. Just make sure that you know your DHCP pool before proceeding.
Find Your Current IP Address, Gateway, and DNS Servers
Before we can set up a static IP address, we need to know your current network settings. You are going to want to write these down, so get a pencil and paper handy. For this step, we are going to use the command prompt.
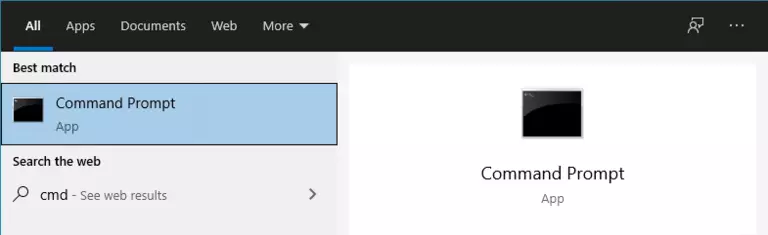
Open up a command prompt any way that you know. The most common ways are:
- Windows Key, then start typing the phrase "cmd", then press Enter when you see "Command Prompt" highlighted.
- Windows Key +R (opens the Run dialog box), followed by 'cmd', then Enter
- Right-click the Windows Key, then choose 'Windows PowerShell' (white text on blue background)
Once you are in the command prompt, type the following command:
ipconfig /all
You will see a lot of data. If you have virtual network adapters or multiple network adapters, then you will see even more data. It is common to see many virtual adapters if you have either Hyper-V or Docker installed.
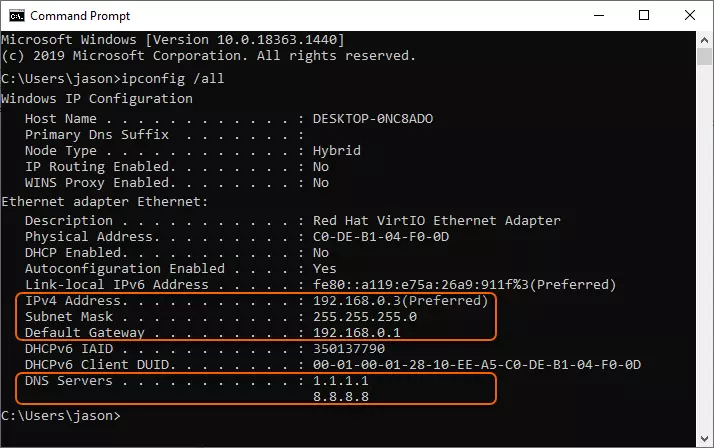
Most of the network adapters listed from ipconfig will not work for this step. We need to find an adapter that has valid settings. Scroll through the list of adapters and find one that has a Default Gateway assigned. Many of the virtual adapters will not have a Default Gateway. You need to find a Default Gateway that has a similar IP address to the IPv4 address listed for the adapter.
For instance, if you find an adapter with an IPv4 address that is 192.168.0.100, and the Default Gateway is 192.168.0.1, this is a suitable adapter for this step.
Write down the following information from the adapter that you choose:
- IPv4 Address (most likely 192.168.0.x or 192.168.1.x, where x is a number above 0)
- Subnet Mask (most likely 255.255.255.0)
- Default Gateway (most likely 192.168.0.1 or 192.168.1.1)
- DNS Servers (not strictly necessary)
To assign a static IP address by hand, we need to find one that is available. There are many ways to do this, but we will use the currently assigned IP address for this guide.
NOTE: This will not always work. It is better to choose an IP address outside of your current DHCP pool. You can automate this process using the software solution below.
You can also choose another IP address that is far away from your current address. For instance, if your IP address is:
192.168.0.101
Then choose something like:
192.168.0.230
Just do not choose 192.168.0.1 or 192.168.1.1 as those are usually gateway addresses. Keep the last number under 254 as well.
For the remainder of this guide, use the IP address that you choose here.
Modify Ethernet Adapter Settings
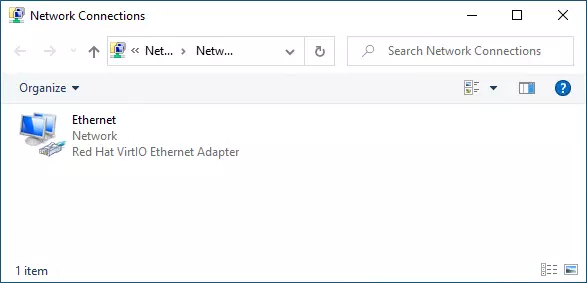
Now we need to change the settings on your network card or ethernet adapter. To get to the settings for your network, the fastest method is:
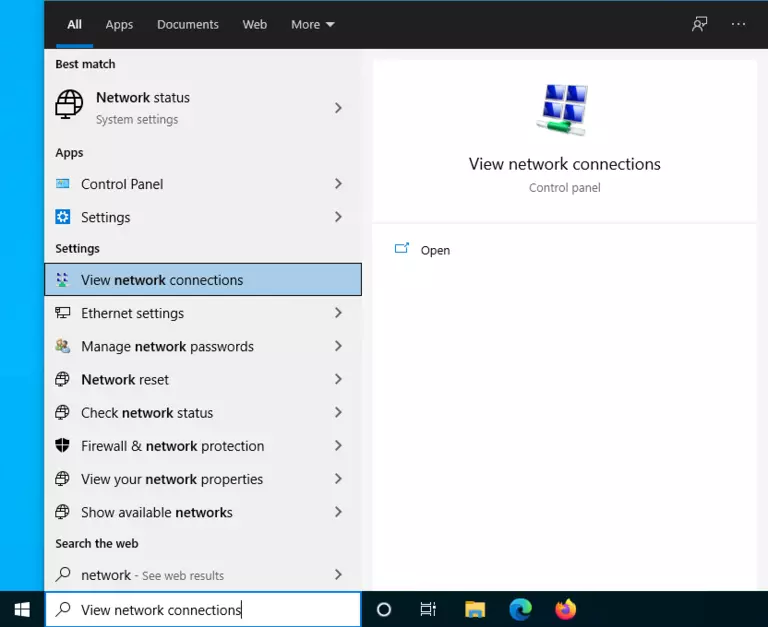
- Single tap the Windows key
- Type the phrase network connections until you see View network connections.
- Press the Enter key
You should see a list of network connections on your computer. If you have Hyper-V or Docker installed, there can be many. Look for any adapters that are not named "Hyper-V".
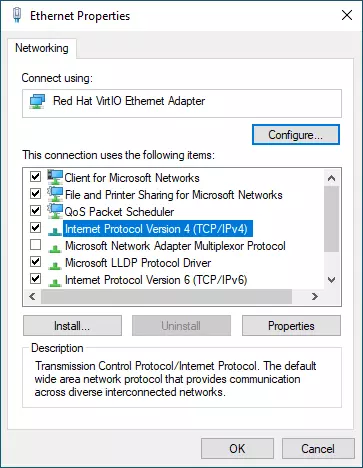
Right-click on your adapter and choose properties. If Internet Protocol Version 4 is not checked, then this is the wrong adapter. Choose a different one.
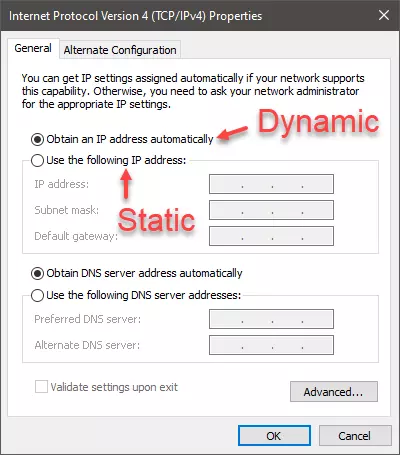
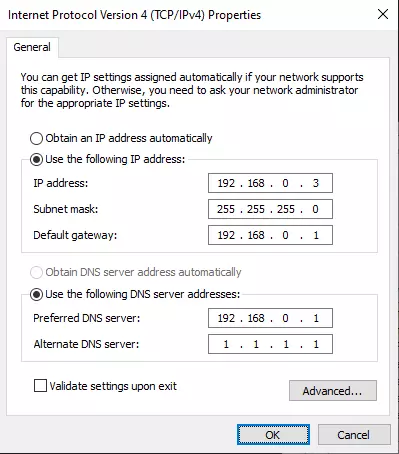
Double click on Internet Protocol Version 4. Change Obtain an IP address automatically to Use the following IP address.
Fill out the IP address, Subnet mask, Default gateway, and Preferred DNS server with the information from above.
Alternatively, instead of using your DNS servers, you can use either the CloudFlare or Google DNS servers:
- CloudFlare DNS: 1.1.1.1
- Google DNS: 8.8.8.8
Click Ok, then click Ok again, and your adapter is now changed from DHCP to static. Surf the web to make sure that you still have internet connectivity. If you do not, then change your settings back to Obtain an IP address automatically.
Set Up a Static IP Address Using DHCP Reservations
A better way to set up a static IP address is to use your router's DHCP reservations feature. Not all routers have this feature, so this may not be an option for you.
However, if your router does have this feature, it is an excellent choice for reserving a static IP address for all of the devices in your home. DHCP reservations allow you to centrally manage all of your home IP addresses from a single interface and will enable you to change settings on devices that you may otherwise not be able to edit. DHCP reservations are a fantastic option for game consoles, home automation, security cameras, phones, tablets, and more.
Set Up a Static IP Address Automatically
Another simple option for setting up a static IP address is to use our free Static IP Setter, which is a part of our Network Utilities software bundle. The Static IP Setter is free to use and automates all of the steps listed above.
The Static IP Setter will find your current settings, then scan your network for IP address conflicts, and help you choose an IP address to use on your computer.
Step 2: Log in to your router
Now that you have a static IP address (or DHCP reservation) on your device, you are ready to forward a port.
To start, we need to log in to your router. Earlier, one of the settings that you wrote down is your Default Gateway. That is the IP address of your router.
Routers use a locally hosted web page for management. To view your router's menu and settings:
- Open up a web browser. Firefox, Chrome, Edge, or Opera should work fine.
- In the address bar, type your Default Gateway IP address, such as 192.168.0.1 or 192.168.1.1
- Press Enter
You should now see your router's login screen. Not all routers require a login, but most do. You need to know your router's username and password. If you have never logged in before, your username and password are most likely set to the factory default values. You can find a list of all factory default router usernames and passwords, or you can take a few educated guesses.
Some of the most common factory usernames and passwords are listed here:
Try various combinations of admin, password, and leaving the entries blank. *Where it says blank, try leaving the value blank.*
Username Password admin admin admin password {blank} admin {blank} password
For an extensive list of passwords for your router, choose your manufacturer from our Router List and try all of the combinations listed.
If you have changed your router's username and password but cannot remember it, you have a few options, including:
- Factory reset your router (warning: this can cause a lot of frustration)
- Run our Router Login tool, part of Network Utilities, to help you guess your forgotten password
- Follow our How to Reset a Router Password guide
Step 3: Create port forwards
Find the port forwarding section in your router menu. Navigate around in your router by clicking the tabs or links at the top or left of each page. Most routers list the port forwarding section under Network, Advanced, or LAN. Look for the following keywords to help you find it:
- Port Forwarding
- Forwarding
- Port Range Forwarding
- Virtual Servers
- Apps & Gaming
Here are a few examples of what the port forwarding section looks like in some routers.
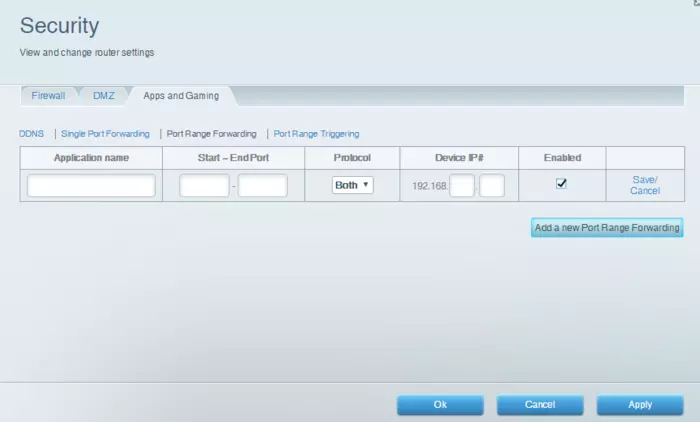
Linksys Routers
Most Linksys routers call the port forwarding section Apps and Gaming, and they have a blue interface that resembles the following:
TP-Link Routers
TP-Link routers are usually light blue and yellow, and you can find the port forwarding section under the NAT Forwarding tab, called Virtual Servers.

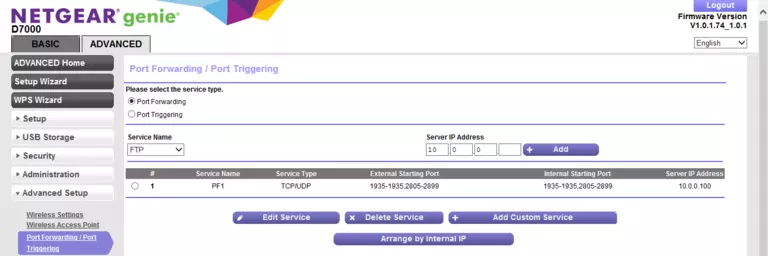
Netgear Routers
Netgear routers have the port forwarding section in the Advanced Setup tab, in a link called Port Forwarding / Port Triggering:
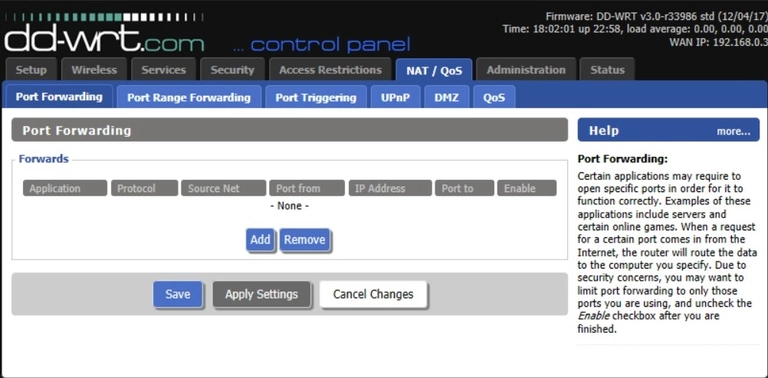
DD-WRT Firmware
If you have the aftermarket dd-wrt firmware installed, then you can find the port forwarding section under the NAT QoS tab:
For detailed instructions on how to forward ports in your specific router visit our router guides.
Enter the ports and destination IP address
Once you find your router's port forwarding (or virtual servers) section, you are ready to enter the necessary information.
A port forward points TCP and UDP numbers at an internal IP address. In other words, you need to forward a port to an IP address.
- Source: Port numbers
- Destination: IP address
Your router will have a place to enter the ports to be forwarded and the destination IP address to point those forwarded ports. If your router lists both Internal and External ports, make them the same. This is a feature called Port Translation that not all routers offer. In the protocol selection, choose TCP or UDP depending on what your application requires. Remember, you can always select both if you do not know.
For detailed port forwarding guides specific to your router visit our router guides.
Most routers have a Save button, and many routers require a restart or reboot for the changes to take effect. When in doubt, click the Save button and then reboot your router.
Open port in Windows Firewall
Normally when you launch an application that needs a port forward, Windows asks you if it is ok to add a rule in the firewall automatically. As long as you know which application you just launched, it is generally a good idea to choose yes and let Windows create this rule for you. If you do not create a rule in the firewall, then even if you forward your ports correctly, your application will not work as it should.
If you have already launched your application and told Windows no, meaning do not create a rule in the firewall, then you must go create a rule in your Windows Firewall manually. This rule will use the same TCP and UDP ports that you forward in your router, but it will not require a destination IP since the destination IP is your computer.
Step 4: Test port forwarding
Once you've set up your port forward, it's a good idea to test it. Testing a port forward is complex, and the best test is to see if it solves the problem you are having.
If you are forwarding a port to your computer, then you can use the Port Checker tool in our Network Utilities software to test if the port is open. Our port checker is the only checker that can test with 100% accuracy if your port is forwarded or not. You can use it to test UDP and TCP ports, something most other port checkers cannot do.
When you first attempt to test a forwarded port with our Port Checker, the Windows Firewall should pop up a prompt asking if you want to create a rule allowing traffic in on that port. Always allow this traffic, or else the forwarded port will not work correctly.
Sometimes while troubleshooting a forwarded port, it's a good idea to forward a test port to your computer so that you know that the software you are forwarding for is not getting in the way. We usually suggest testing forwarding port 1,000 TCP and UDP to your computer. You can then use the Port Checker to see if port 1,000 is open or not.
If the test forward is not open, then you can start troubleshooting the Windows Firewall.
There are a few ISPs out there that do not allow incoming traffic to connect to your network. It is a common problem with 4G and 5G cellular internet providers. They typically hide your internet connection behind a NAT, which means that they would need to set up a forward in their NAT identical to what you set up in your router for you to receive an incoming packet. It is uncommon for them to do this.
Is Port Forwarding Safe?
You're probably wondering how safe it is to forward ports. How safe it is to forward ports depends on the application and device that you are forwarding ports for. Be aware that you are allowing an incoming connection to your network, so it does come with some risks. For details about how to safely forward ports visit Is port forwarding safe?

Forwarding a port to a gaming console such as an Xbox or PlayStation is entirely safe.
Forwarding a port to a personal web server may be less safe unless you know how to secure your web server.
The forwarded port will only allow specific traffic to make it to one particular device on your network. You are not tearing down your firewall as much as you are creating a pinhole through it.
To get started with forwarding ports in your router visit our router guides.
To port forward the easy way, check out our Network Utilities software that configures your router for you.


