Connecting to a wireless network is easy with WindowsXP. Usually you just pick the network from a list of available networks and join. After that you are ready to talk on the Internet.
Things can get more difficult when you want to connect to a secure wireless network. This guide will walk you through the steps necessary to connect a standard Windows XP Service Pack 2 computer to a locked down and secured wireless network.
Covered in this article
- Why you Should Secure your Wireless Network
- How to Connect to your Secure Wireless Network
- How to Verify that Your Wireless Network is Secure
Why you Should Secure your Wireless Network
Securing your wireless network is something that every router owner should do. Keep in mind that as the owner of a wireless router YOU are responsible for the traffic that flows over that router. This is no matter to take lightly. If you neighbors break the law while connected to your wireless network, your ISP will hold you responsible. If you have not done so already, please secure your wireless network by taking the following steps at a minimum:
- Set your SSID to anything other than the factory default. SSID is a techinical term for your wireless networks name.
- Turn OFF SSID broadcast. Broadcasting your SSID is like telling the world "Here I am!"
- Turn ON encryption. WPA is the preferred choice, but WEP Open Key is better than nothing.
Keep in mind that 99% of all routers ship with the factory defaults WIDE OPEN! If you do not secure your wireless network, you are inviting everyone in your neighborhood to use your network. This gives every who lives near you access to not only your bandwidth, but also to your computers including your personal data files. You absolutly must secure your wireless network or else you are asking for trouble.
How To Connect
Once you have secured your wireless network, it will take a couple of steps to get Windows XP to connect to it. You only have to do these steps once; after you have connected Windows will remember your settings.
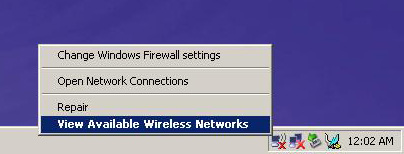
Start by Right-Clicking on the little wireless networking icon next to your clock. It is the one that looks like a computer with 2 radio waves coming out of it. Here is a zoomed in copy of what you are looking for:
![]()
When you right click on this icon, you should get a popup menu. Click on the bottom choice, which is View Available Wireless Networks.
This should take you to the Choose a wireless network screen. Make sure that your network is NOT listed. It should say No wireless networks were found in range. This is good; this means that you have turned your SSID Broadcast off. You may see your neighbors SSID on this screen. Avoid the temptation to simply join their wireless network. You may want to notify them that their wireless network is broadcasting its SSID. If they do not know what you mean, take the time to teach them.
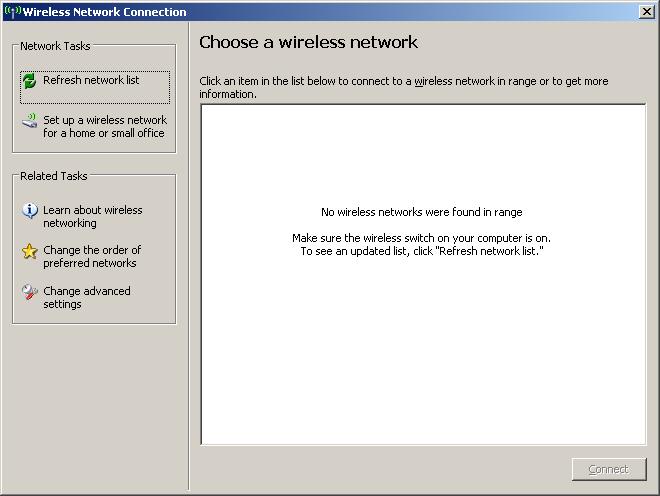
Now click on Change advanced settings.
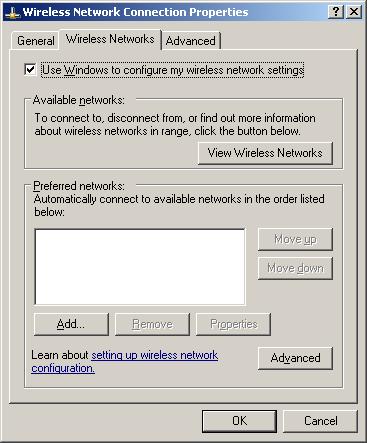
You should now see the window called Wireless Network Connection Properties. Click on the tab called Wireless Networks, then click on the button called Add....
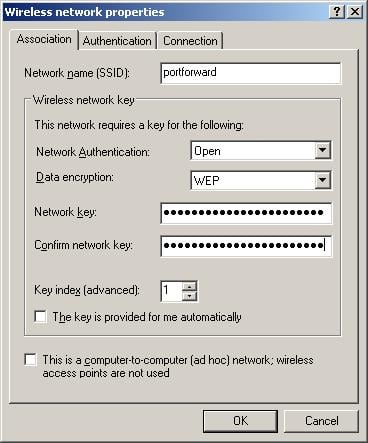
You should now see the window called Wireless network properties. This tab has all the settings that we need. In the box called Network name (SSID): put that name that you picked for your network. You can see in the example below that we called our network portforward.
Depending on the encryption type you have chosen for your network, the following steps may be a little bit different. The example below is for WEP encryption, because that is the type that most people currently use. If WPA is available for you, it is a superior choice.
In the drop down box called Data encryption pick the encryption type that you have chosen for your network. You can see that we have chosen WEP for our network.
In the drop down box called Network Authentication pick the wireless authentication type that you have choose for your network. In this case we have chosen Open. Remember that Open is better than Shared. Shared is considered pretty much useless for most people.
Make sure that there is NOT a check in the box called The key is provided for me automatically. Now you can type your network key in the box called Network key. You made up your personal network key when you turned on security on your router. Most people can leave the Key index at 1.
Click Ok twice to close the 2 open dialog boxes.
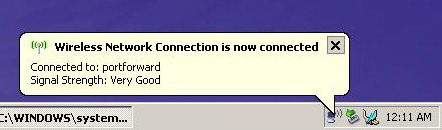
If you have done everything correctly, you should get a popup window that tells you that you are now connected to your wireless network. Windows will refer to your wireless network by the SSID that you assigned it. If it says Connected to: followed by a name other than your SSID, then you are connected to someone else's wireless network. You can use the Signal Strength indication to know where your wireless network can be connected to. Ideally, you only want your wireless network to be visible in your house or on your property. Now would be a good time to walk around and see how far your access point is transmitting.
How to Verify that your Wireless Network is Secure
Verifying that your wireless network is secure is easy. Go back through the above steps. Only this time, intentionally misspell your wireless networks name (SSID). When you get to to the bottom, Windows should tell you that it was unable to connect.
To verify that your encryption is working correctly, go back through the above steps and intentionally mistype your key. When you get to the end of the guide Windows will report back that it has connected ok. However, you will not be able to surf the web or check your email.
Once you have verified that you network is indeed secure, go through the guide a final time and put all of your information in correctly. Windows will connect to your wireless network and you will be able to surf the web and check your email.
Congratulations, you have joined your secure wireless network!